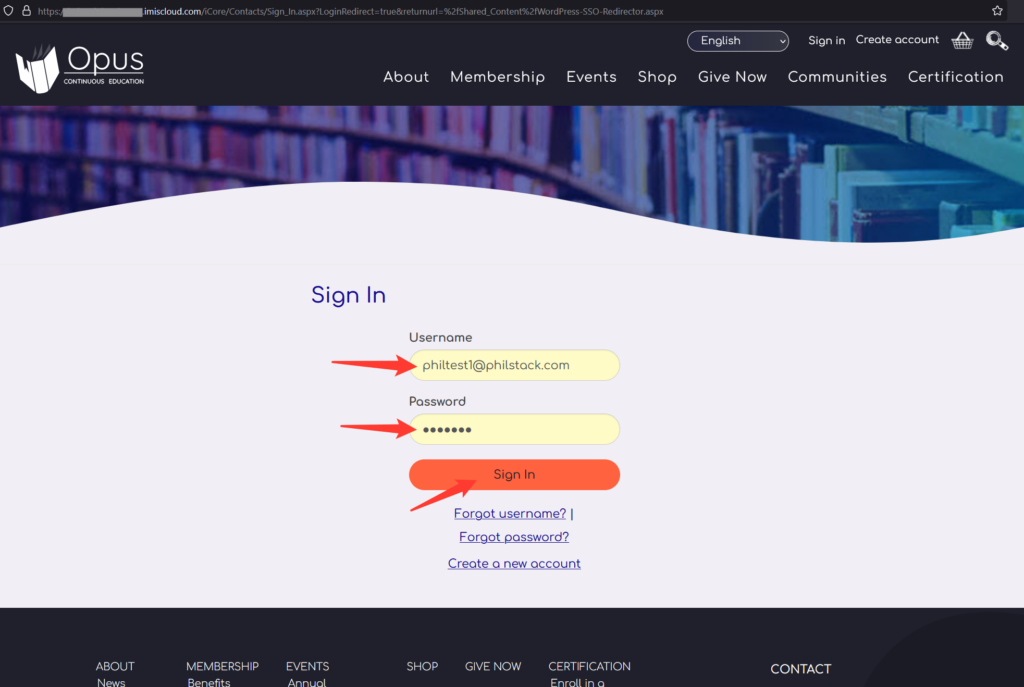
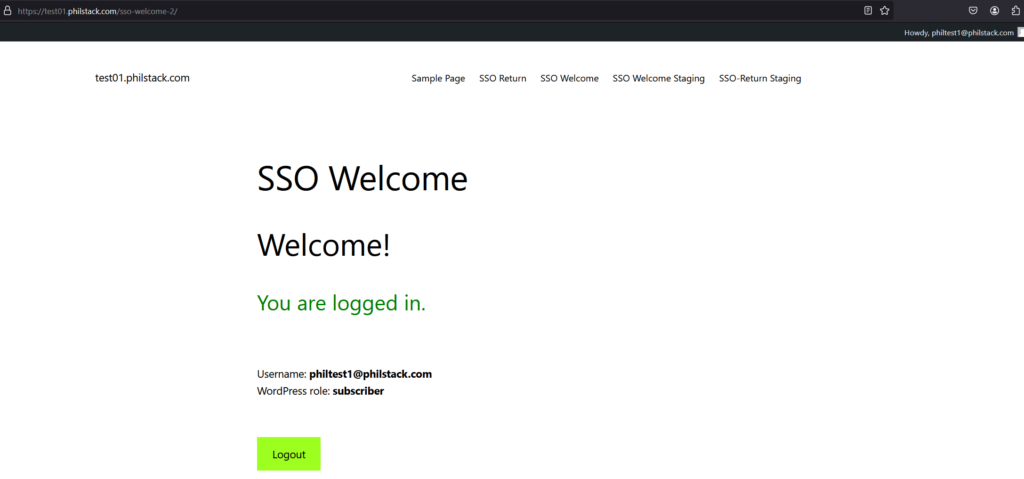
Single Sign On (SSO) allows your users to log into WordPress using iMIS.
- This is done using the Philstack iMIS SSO Plugin for WordPress and iMIS EMS Enterprise.
- This post provides a general overview of configuring SSO with iMIS and WordPress and shows you how the plugin works.

Before we begin...
- You will need to know the basics of how to use iMIS and WordPress as an administrator.
- You will need admin-level access to both iMIS and WordPress.
Important!
The purchase of the Philstack iMIS SSO plugin for WordPress includes white-glove installation and configuration of SSO between your iMIS system and one WordPress site.
When you buy the plugin, Phil does everything below (and more) for you at no extra charge!
Interested?
Enter your email and you’ll be up and running in no time!
Configuring iMIS
2
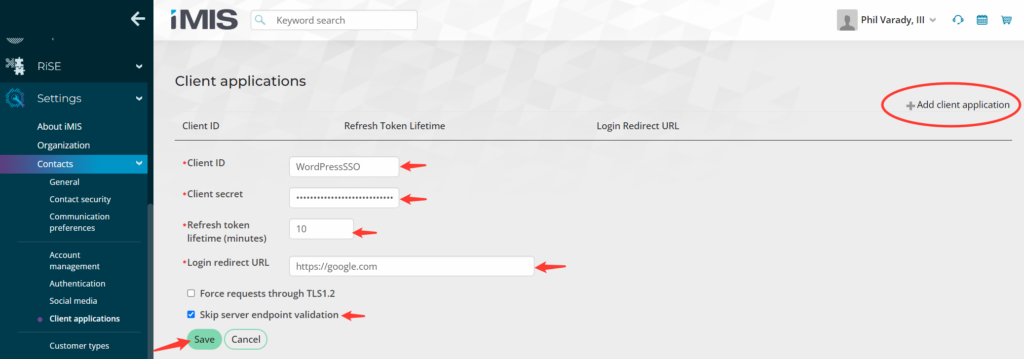
Click ‘Add client application’ and complete the following fields, then click Save:
Client ID – this is a unique identifier that you pick, it can be anything. This example will use “WordPressSSO” as the client ID.
- Keep this value somewhere handy – you’ll need it for a later step!
Client Secret – this is an important password that is essential to keep secure. Random string generators like this one are useful for creating long strings that make good passwords.
- Keep this value somewhere handy and safe – you’ll need it for a later step!
Refresh token lifetime (minutes) – I recommend using the value ’10’.
Login redirect URL – use https://google.com as a temporary value for this setting.
We will come back and update this later after we have WordPress configured.
Force requests through TLS 1.2 – leave unchecked.
Skip server endpoint validation – check this box to avoid problems with iMIS validating your WordPress server endpoint. In many environments, there are security conditions that will prevent this validation and result in SSO issues.
4
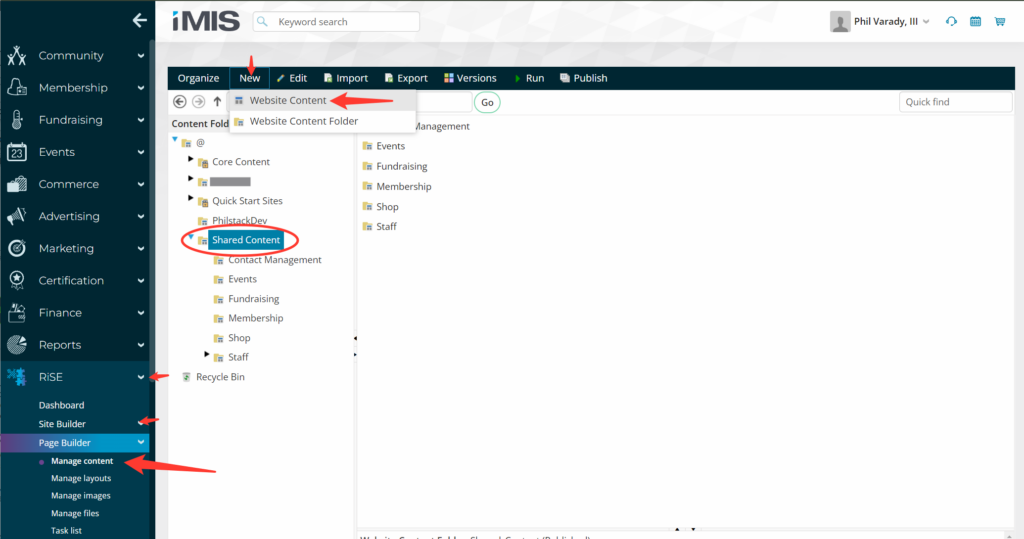
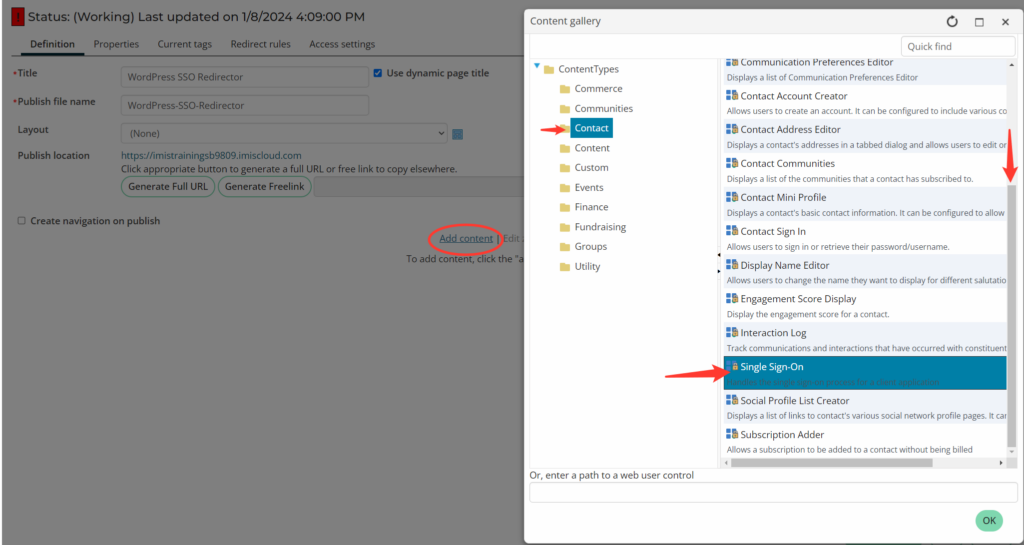
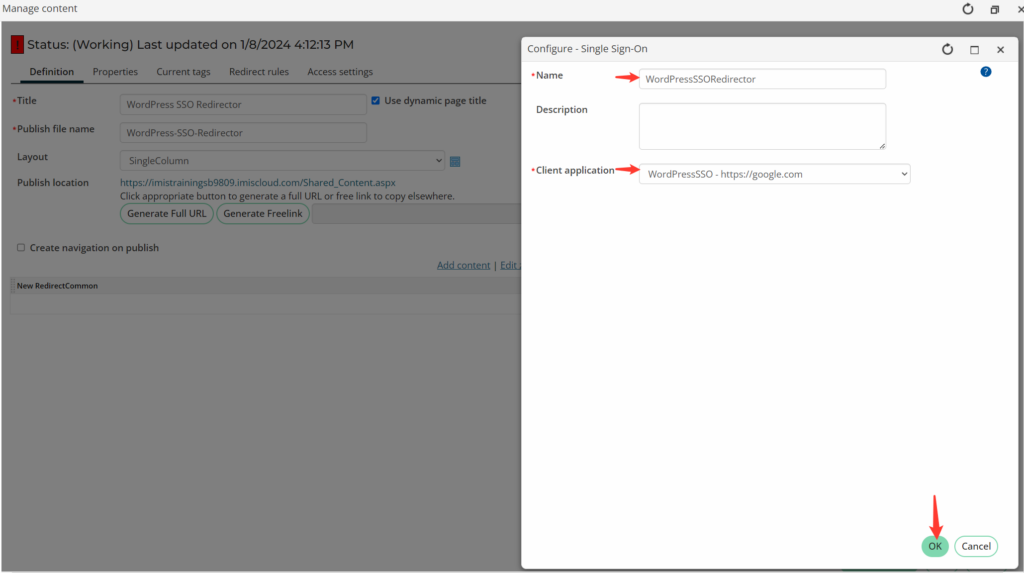
Set the Title to something like “WordPress SSO Redirector”, then add the built-in SSO iPart using the Add content link:
Change the Name field to something like “WordPressSSORedirector”, and select the “WordPressSSO” entry from the drop down menu, then click OK:
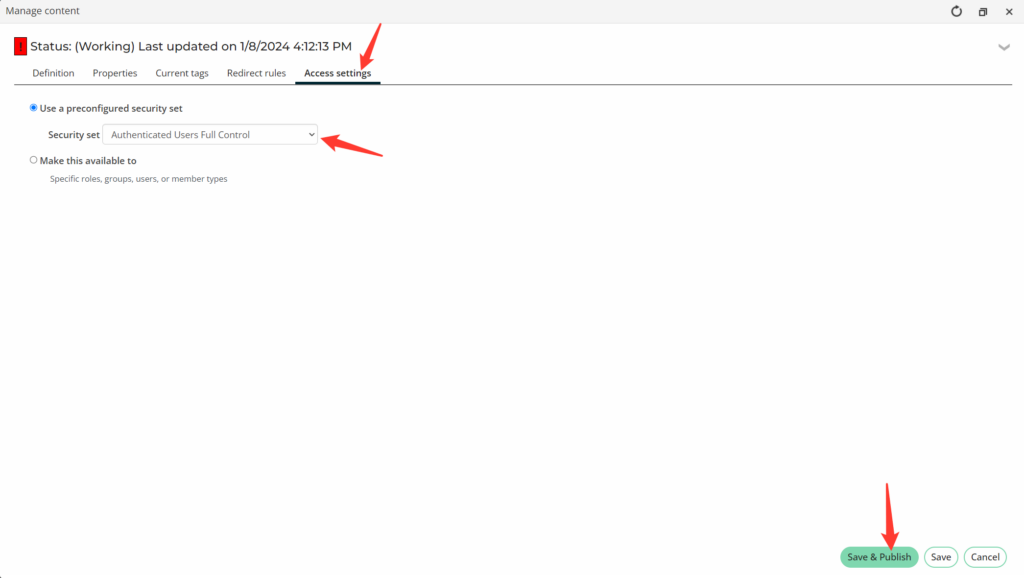
On the Access Settings tab, change the preconfigured security set to Authenticated Users Full Control. Then, click Save & Publish:
5
Configuring WordPress
1
Login to your WordPress admin site as a user with admin rights.
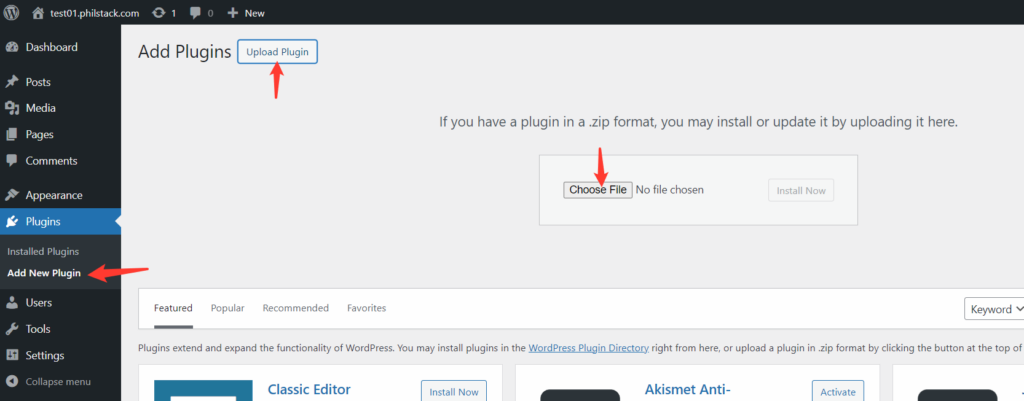
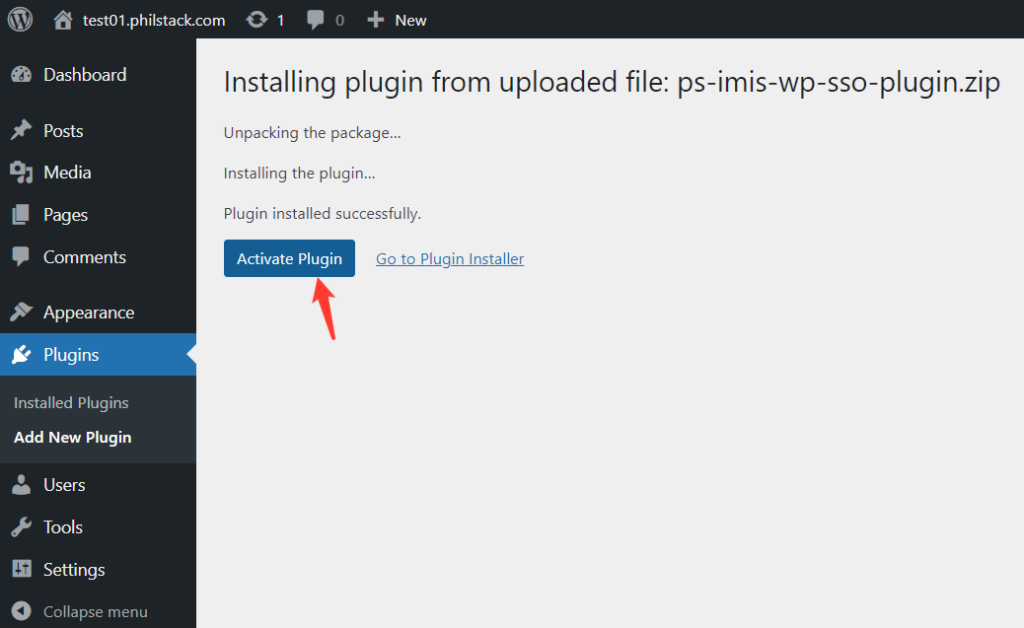
Go to Plugins and click Add New Plugin. Click Upload Plugin and select the Zip file that was provided by Philstack for the Philstack iMIS SSO plugin for WordPress.
2
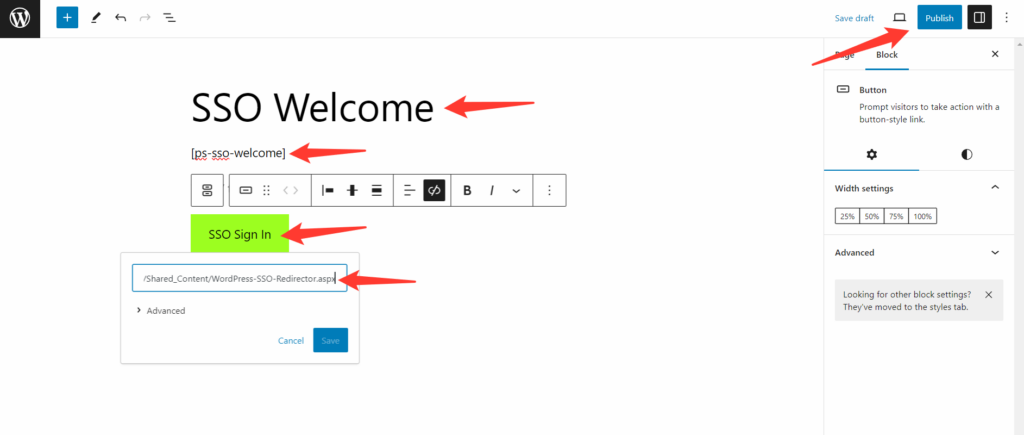
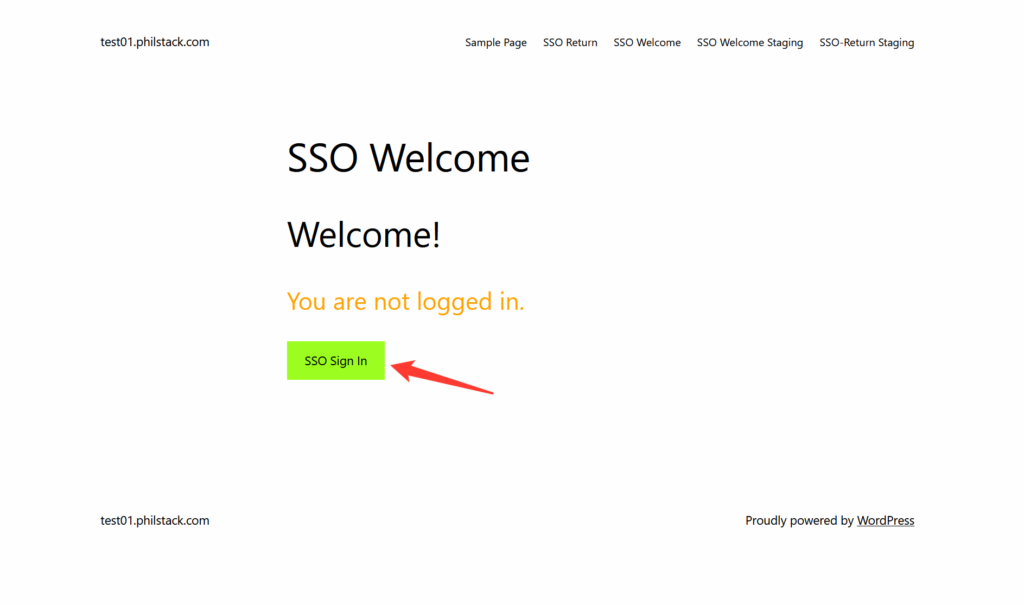
Click on Pages and then click Add New Page. Update the page as follows:
Title – Populate the title as something like ‘SSO Welcome’
Content Block – Input the shortcode [ps-sso-welcome] into a content block.
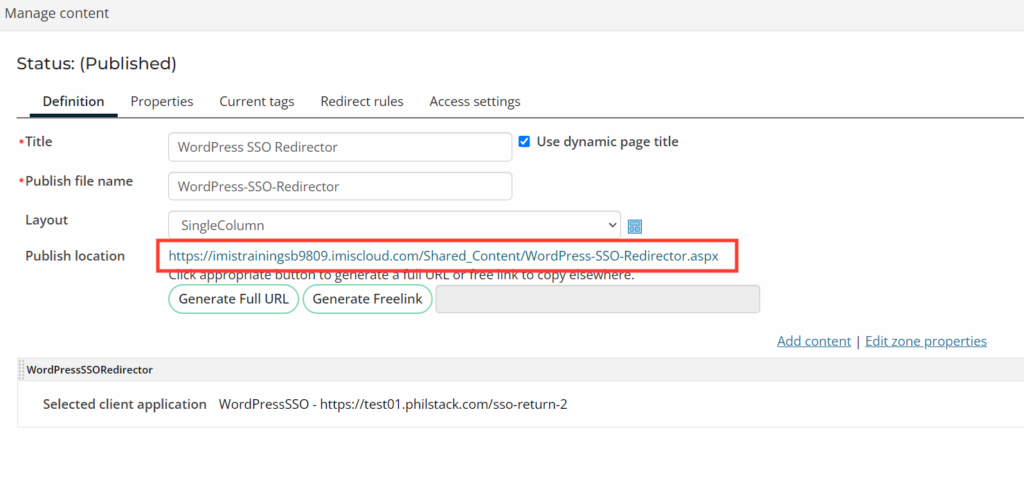
Sign In Button – Add a button to the page and label it “SSO Sign In”. Configure the link destination as the iMIS SSO redirect page (URL from part 1 step 5).
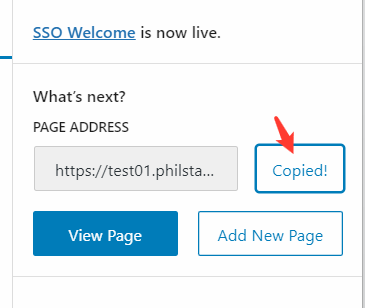
Publish the page – make note of the URL.
- Keep this value somewhere handy – you’ll need it for a later step!
3
Title – Populate the title as something like ‘SSO Return’. This page is never displayed to users, so you don’t need to worry much about the title.
Content Block – Input the shortcode [ps-sso-return] into a content block.
Publish the page – make note of the URL.
- Keep this value somewhere handy – you’ll need it for a later step!
4
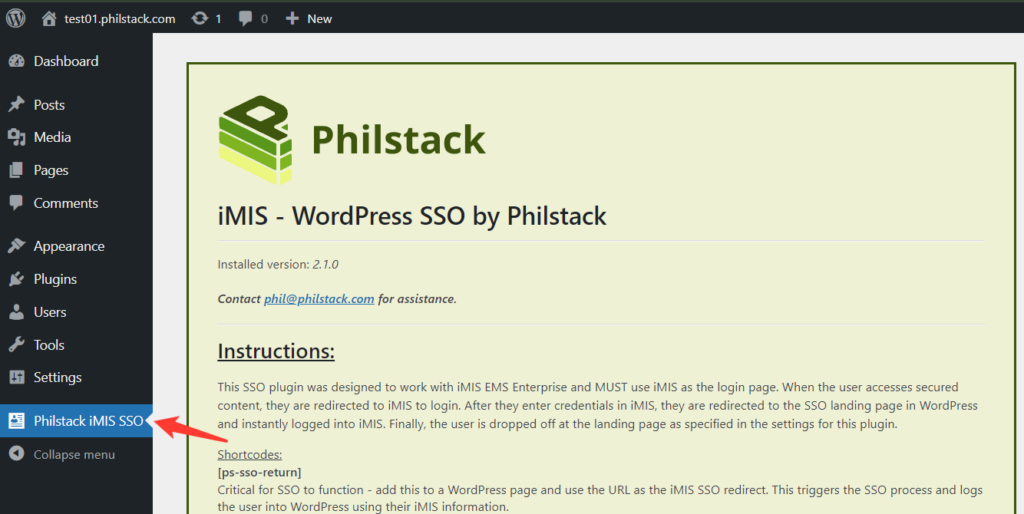
Click the Philstack iMIS SSO link that was added to the WordPress admin menu.
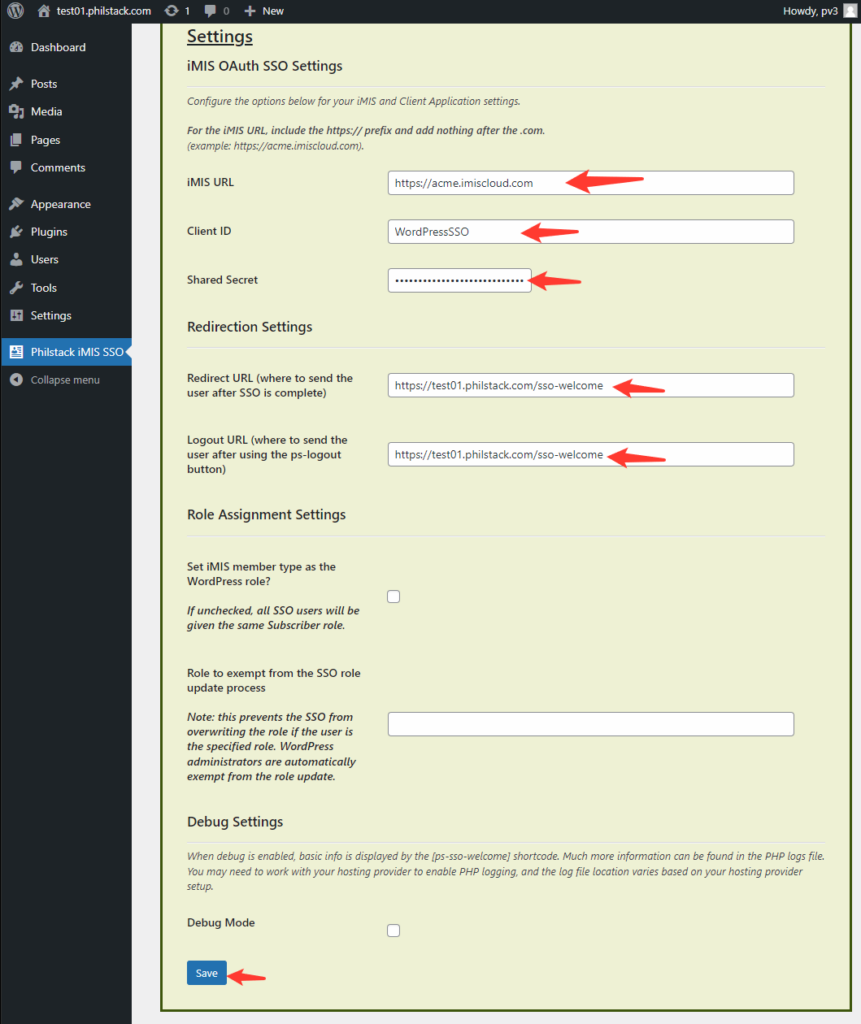
Configure the settings with the following options:
- iMIS URL – iMIS URL: this is the URL root of the iMIS site. For example: “https://acme.imiscloud.com”.
- Client ID – this is the first value we set in part 1 step 2.
- Shared Secret – this is the second value we set in part 1 step 2.
- Redirect URL – use the welcome page URL from part 2 step 2.
- Logout URL – use the welcome page URL from part 2 step 2.
Click Save at the bottom of the admin page when you have finished entering the settings above.
Update the iMIS Redirect URL
1
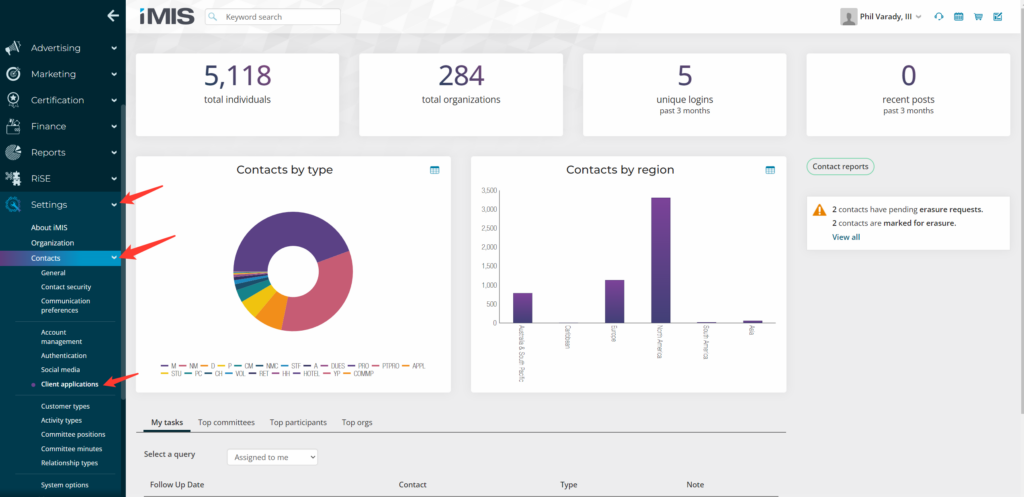
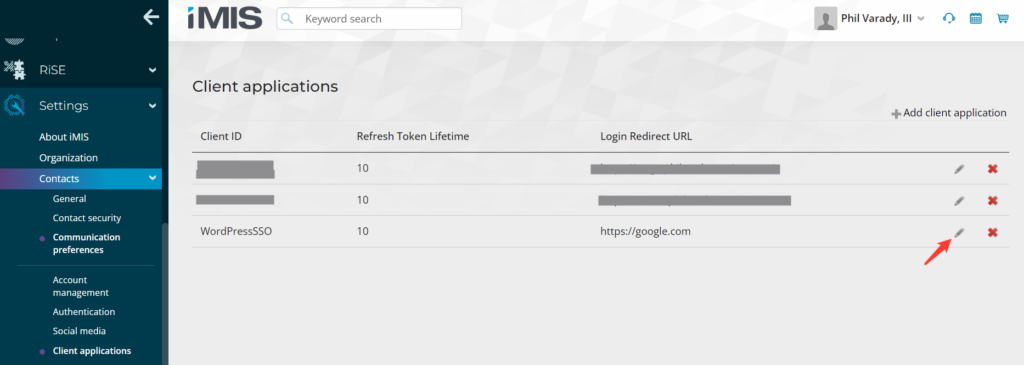
Back on the iMIS Staff Site, navigate to the Settings > Contacts > Client Applications page. Click on the pencil that corresponds with the client application that we created in part 1 step 2.
2
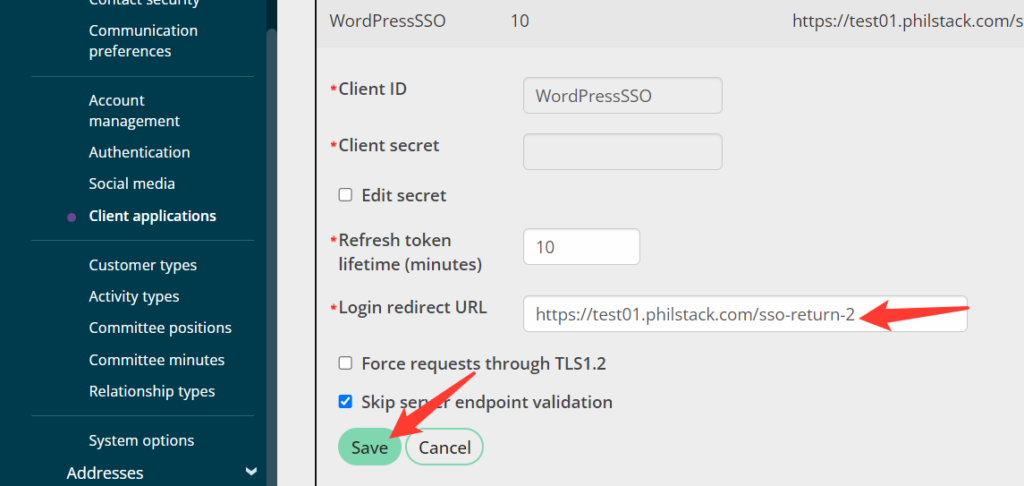
In the Login redirect URL field, replace google.com with the URL for the WordPress SSO return page we set up in part 2 step 3.
Testing and Demonstration
Roles and Redirection Options
Coming soon – more details about how to make sure the user gets logged out from both systems, different redirection scenarios, role options, and more.
Stay tuned!
Philstack SSO Plugin
Pricing and Demo
Enter your email and I’ll send you all the details and more about the Philstack iMIS SSO plugin for WordPress.
